Zonation model
On this form (1D MODEL > Lithology > Settings > Zonation Model), you can observe the various settings related to the Zonation Model. Among these are settings for each zone, segment, and the rock type settings controlled in the Rock Type view. The Low Lith, High Lith, and Discriminator Values can be controlled from within this view.
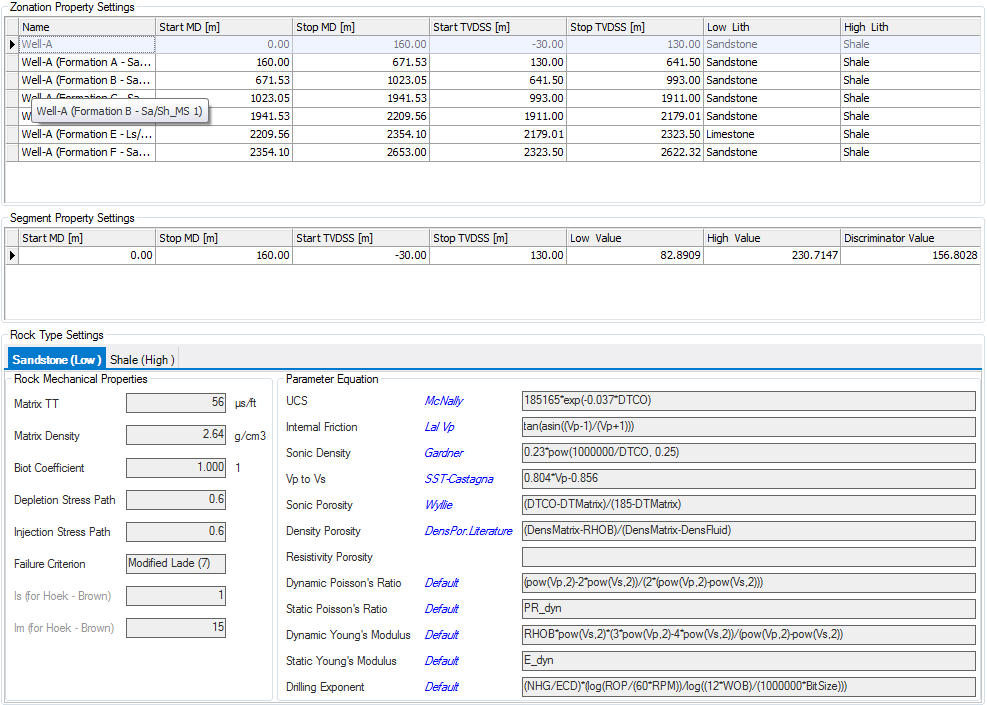
Example zonation model parameters click to enlarge
Specifying shale discriminators
Specific shale discriminator values can be set for each segment in the Zonation Property Settings table at the top of the view. Click on a row to select that depth segment, and you may then edit the Low value, High value, and Discriminator Value fields in the Segment Property Settings pane; double-click in the field, type a new value, and press Enter on the keyboard to update the table.
Changing default lithology types
click to enlarge
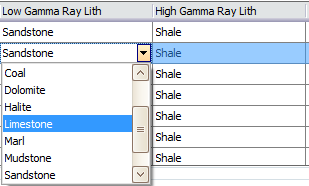
The Zonation Model form shows the settings for the low- and high- lithologies of the selected segment. You may change the lithology listed in the Low Lith and High Lith columns by clicking in the cell for either column. A drop down menu will appear from which you may select alternate lithology.
After a new lithology has been selected, and if the Automatic Update lock icon of the zonation calculation on the Lithology Model form is locked, you will need to click the (Re)Calculate button to update the Lithology Column in the Zonation Model.
Selecting zonation manually
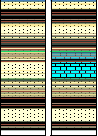
A Lithology Column updated with one of the depth segments changed to Limestone click to enlarge
When the calculation type on the Lithology Model form is set to Manual, any existing zones can be altered by clicking into the table and modifying the data. When modifying start and stop depths the table values are recalculated when the manual modification causes one zone to overlap another.
In addition to modifying existing zones, new zones can be added through the right-click context menu in the table. Opening the context menu for a specific zone provides the option to add a new, blank zonation above or below the zone. This zone can then be manually populated with data.

Modifying table click to enlarge
Rock type settings
The lower form of the Zonation/Segment Settings view shows the Rock Type Settings for the low- and high- lithologies of the current segment. As noted above, you may change the lithologies listed for the Low and High columns by making a new selection from the drop-down box from either category. All of the fields in this form are read-only, however, the parameter equations can be reviewed and changed in the Rock Types view, which is opened in Step 1 of the Rock Properties workflow form.
Segment property settings
Segments are located between two formation markers. Segments are created with the aim of having differentiators within markers without been markers themselves. When Automatic mode is selected, these segments are calculated based on the depths between the formation markers and final hole depth or casing depth. These segments could not be editable in the automatic mode. However, if you want to update the values or create new segments, you can do so by changing to Manual (vertical) mode.
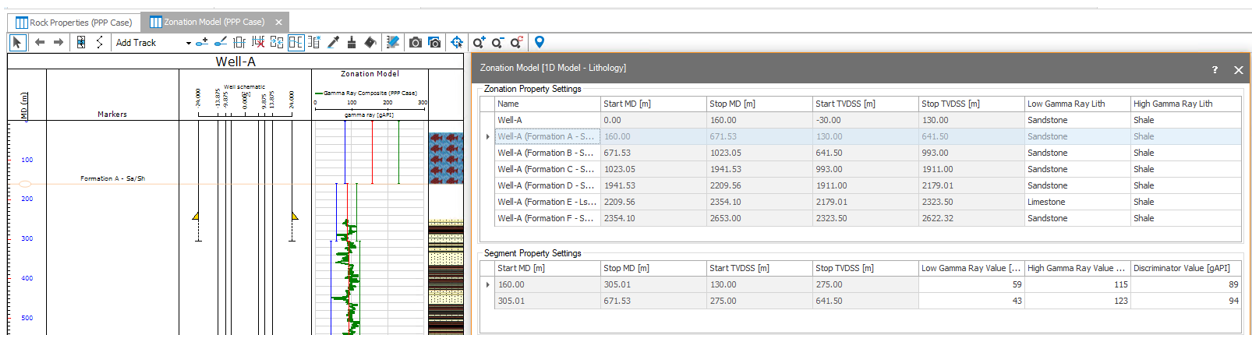
Zonation property settings and Segment property settings click to enlarge
Inserting new segments
This mechanism is the same as inserting a new zonation. Right-click into the cell in the Segment Property settings to add a new segment below or above the cell itself. You may also edit per segment the high, low and discriminator values of the log used to define the lithology modeling.